Tag Archives: troubleshooting

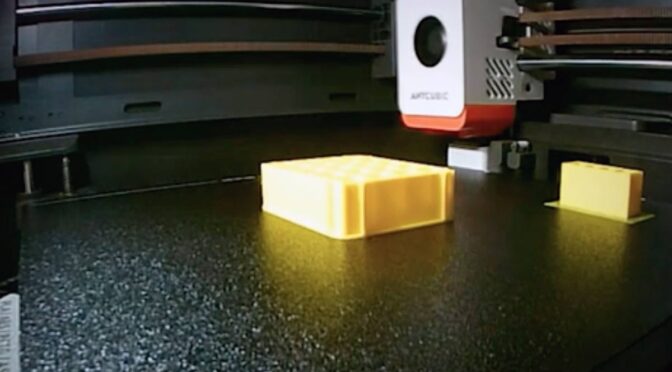
Deep Dive : The Art of Watching 3D Prints with LM Notebook

In this post, we utilise Google’s LM Notebook to create a Deep Dive into this article.

Listen in to the deep dive and let me know what you think!!!

This article explores the surprisingly captivating experience of watching a 3D printer at work, delving into the perspectives of both the creator of a 3D model and casual observers. It questions whether this act is genuinely satisfying or simply hypnotic, examining the emotional, practical, and psychological elements at play.

Key Themes and Ideas:

  1. Dual Perspectives: Creator vs. Viewer:
  • The Creator: For those who have designed a 3D model, the act of watching it print is a deeply personal and often emotional experience. It’s likened to watching a sculptor carve marble and it’s directly tied to their creative vision and anticipation of the final product.
  • Quote: “For those of us who have spent hours—sometimes days—designing a model, watching it come to life can feel akin to witnessing a sculptor carving marble. The experience is deeply personal, tied to the creative process and the anticipation of seeing your vision materialise.”
  • Practicality for Creators: Beyond the emotional aspect, watching a print can also provide invaluable insight into potential design flaws, allowing for refinement of the process. The creator can observe issues like poor filament flow or miscalculations.
  • The Viewer: For those not involved in the design, watching a 3D printer can be a mesmerising experience due to the rhythmic movement of the print head and the slow transformation of filament into a physical object. This is often compared to watching a campfire – soothing and meditative.
  • Quote: “For the uninitiated, the spectacle of a 3D printer at work can be downright mesmerising. There’s something hypnotic about the rhythmic movements of the print head, the hum of the stepper motors, and the slow but steady transformation of raw filament into a tangible object.”
  1. The Element of Satisfaction:
  • Creator Satisfaction: For creators, satisfaction can stem from witnessing the culmination of their design efforts and from the troubleshooting and learning aspects of observing the print. It is also admitted that the novelty of watching a large print wear off and can become monotonous after a while.
  • Viewer Satisfaction: Viewers find satisfaction in the precision of the printing process and the visual transformation, often condensed into time-lapse videos on platforms like YouTube and TikTok. The real-time experience is described as relaxing, if not always engaging for long periods.
  • Quote: “These videos are undeniably satisfying, combining the visual appeal of precision engineering with the gratification of seeing a project completed in record time. But is the live experience equally captivating?”
  1. The Role of Time:
  • Patience vs. Anticipation: Watching a print in real-time requires patience, and the article compares this to “watching a pot boil” where anticipation can sometimes outweigh the actual event.
  • Time-lapse vs. Real-Time: Time-lapse videos significantly enhance the viewing experience for casual observers, condensing hours of printing into seconds or minutes, therefore providing an instant gratification. The live experience, while relaxing for some, might not hold the same level of engagement.
  1. Remote Monitoring and its Impact:
  • Convenience: Remote monitoring via webcams or software like OctoPrint allows creators to oversee the printing process without being physically present. This is a practical benefit but potentially removes the immersive aspect of watching in-person.
  • Enhanced Time-lapse: Modern printers often feature built-in cameras and time-lapse functions, and open-source tools like OctoPrint enhance the quality of time-lapse footage by homing the print head during capture. This also allows for cleaner and engaging footage to be shared.
  • Connecting Creators and Viewers: Remote monitoring and live streaming open up opportunities to share the process with a wider audience, bridging the gap between creators and viewers.
  1. The Subjective Nature of the Experience:
  • No Definitive Answer: Ultimately, the article concludes that whether watching a 3D print is satisfying or not is subjective. It depends on individual perspectives, personal interests, and the context of the print.
  • Quote: “So, is watching a 3D print satisfying? The answer, unsurprisingly, is subjective. For creators, the process can be a blend of satisfaction, anticipation, and anxiety. For viewers, it’s often a mix of curiosity and relaxation, with the level of engagement varying based on personal interest.”
  • A Shared Appreciation: The real value is perhaps found in the shared appreciation for the technology, whether you’re a maker looking for flaws, a viewer enjoying the process, or someone enjoying the condensed versions of the prints online.

Conclusion:

Watching 3D prints is a multi-faceted experience that engages different emotions and interests depending on whether you are a creator or a viewer. While creators find satisfaction in seeing their design come to life and spotting potential issues, viewers are captivated by the precision and mesmerising process. The use of time-lapses and remote monitoring adds another layer to how individuals experience the act of 3D printing. Ultimately the article concludes that appreciation for the process lies in the intersection of art and engineering and is down to the individual viewer.

 

From Manual Filament Swapping to Automatic Colour Changes: Ender 3 vs Anycubic Kobra S1 Combo

From Manual Filament Swapping to Automatic Colour Changes: Ender 3 vs Anycubic Kobra S1 Combo

As someone who’s had the opportunity to tinker with various 3D printers over the years, I’ve experienced both the joys and frustrations of colour swapping during prints. My journey started with manual filament swaps on the Ender 3, and now I’ve moved on to the seamless (albeit not waste-free) world of automatic colour swapping on the Anycubic Kobra S1 Combo. Let’s dive into the key differences between these two approaches and the lessons I’ve learned along the way.


Manual Filament Swapping on the Ender 3

The Ender 3 is a fantastic workhorse for beginners and enthusiasts alike. However, when it comes to multi-colour printing, you’re limited to manual filament swaps, which can only be done at specific layer heights. While this technique is simple in concept, it comes with its own set of challenges:

How It Works

  1. Design the model with clear layer divisions for each colour.
  2. Use your slicer software (e.g., Cura) to insert filament change commands (commonly M600 G-code) at the desired layer height.
  3. Monitor the printer closely and manually swap the filament when prompted.
  4. Restart the print after the filament is loaded.

Advantages

  • Cost-Effective: No need for additional hardware or upgrades.
  • Straightforward: Simple to set up with basic slicer adjustments.
  • Customisation: Allows for precise colour placement, as long as changes align with flat layers.

Challenges

  • Time-Consuming: You must stay near the printer to swap filament, especially for prints with multiple transitions.
  • Limited to Layers: Colour changes are restricted to flat transitions between layers, making it unsuitable for gradient or complex designs.
  • Risk of Errors: Improper filament loading or extrusion can result in print failures or layer inconsistencies.

The Ender 3 is a simple “bed slinger” design, where the print bed moves along the Y-axis during printing. This makes it easy to understand and maintain but limits its speed and precision compared to more advanced designs. Manual filament swaps on the Ender 3 are a rewarding challenge, but they’re not ideal for prints requiring frequent or intricate colour changes.


Automatic Colour Swapping on the Anycubic Kobra S1 Combo

Enter the Anycubic Kobra S1 Combo, a machine that takes the hassle out of colour transitions with its automatic colour swapping capabilities. This feature is a game-changer for multi-colour printing, but it’s not without its quirks.

How It Works

  1. Load multiple filaments into the system’s multi-material module.
  2. Use your slicer software to assign colours or materials to specific parts of the model.
  3. The printer automatically purges and swaps filaments as required during the print.

Advantages

  • Full Automation: No need to monitor the printer for manual swaps.
  • Flexible Design: Supports intricate, multi-colour models and even gradient effects.
  • Time-Saving: Once the print starts, you can walk away and let the machine handle transitions.
  • Advanced Features: Comes with a four-reel filament holder, filament drying capabilities (ACE Pro), and a completely enclosed design with a self-levelling bed for precision and consistency.
  • Core-X-Y Design: The Kobra S1 uses a core-X-Y motion system, where the print head moves along the X and Y axes, while the bed remains stationary in those directions and only moves along the Z-axis. This design allows for faster and more precise printing.
  • Speed: Prints significantly quicker than the Ender 3, reducing overall production time.

Challenges

  • Purge Waste: Automatic colour swaps generate significant purge waste, especially for frequent transitions. This waste can be a mix of materials and colours, making it harder to recycle.
  • Material Costs: Increased waste also means higher filament consumption, which can add up over time.
  • Complexity: The Kobra S1 Combo’s advanced features and capabilities make it a more complex machine to operate and maintain, compared to the hands-on simplicity of the Ender 3.
  • Calibration Required: Achieving perfect transitions may require fine-tuning slicer settings and calibration.

Despite these challenges, the Kobra S1 Combo excels at delivering high-quality multi-colour prints with minimal effort compared to manual methods.


Key Comparisons

Feature Ender 3 (Manual Swaps) Anycubic Kobra S1 Combo (Automatic)
Ease of Use Labour-intensive Fully automated
Print Complexity Limited to layer changes Supports gradients and intricate designs
Material Waste Minimal Significant purge waste
Time Investment High (requires supervision) Low (set and forget)
Cost Efficiency More cost-effective Higher filament consumption
Learning Curve Simple to learn Requires slicer and printer calibration
Features Basic setup Four-reel holder, filament dryer, enclosed design, self-levelling bed, Core-X-Y system
Speed Slower print times Significantly faster

Which System Is Right for You?

The choice between manual and automatic filament swapping depends largely on your needs:

Creality Ender 3
Creality Ender 3

Ender 3: Ideal for budget-conscious users who don’t mind putting in extra effort to achieve basic multi-colour prints. It’s a hands-on machine that’s perfect for learning and tinkering.

Anycubic Kobra S1 Combo

Anycubic Kobra S1 Combo: Perfect for users looking for convenience and the ability to create complex, high-quality multi-colour designs with minimal manual intervention. Its advanced features make it a powerful tool but with added complexity.

For me, moving to the Kobra S1 Combo has been a revelation. The convenience of automatic colour swapping far outweighs the challenges of purge waste and calibration. That said, the Ender 3 taught me valuable skills and patience, which I still draw upon when troubleshooting more advanced systems.


Final Thoughts

Transitioning from manual to automatic colour swapping is like moving from a bicycle to a car—both get you to your destination, but the experience is vastly different. The Ender 3 is a great starting point for learning the fundamentals of 3D printing, while the Anycubic Kobra S1 Combo opens up a world of possibilities for complex, multi-colour creations.

If you’ve been hesitant to make the leap to automatic systems, consider this: while there’s no substitute for learning the basics, automation can free up your time to focus on what really matters—creating amazing prints.

What’s your experience with colour swapping in 3D printing? I’d love to hear your thoughts in the comments below!

If you are thinking of buying a Anycubic printer, use the discount code MATTPORTER when you check out to receive a £20 discount.

I Automated Malicious IP Blocking with the Help of AI

Introduction: Navigating the complexities of cybersecurity requires a blend of alertness and innovation. In my latest project, I embraced this ethos by deploying AI, particularly ChatGPT-4, to craft a Python script that automates the blocking of malicious IP addresses. (Moreover, the ‘tags‘ you see in this post are the product of a WordPress plugin, also primarily developed with insights from ChatGPT-4 too!)

The Challenge: With brute force attacks becoming increasingly common, developing a swift and automated response mechanism was crucial. My aim was to create a system capable of promptly identifying and neutralizing threats from malicious IP addresses.

AI as a Collaborative Partner: ChatGPT-4’s advanced language understanding capabilities played a pivotal role in this project, assisting both in scripting and in WordPress plugin development.

  1. Script Development: ChatGPT-4 provided step-by-step guidance in crafting a Python script to parse alert emails and extract IP addresses. Its ability to generate code snippets and troubleshoot issues was invaluable.
  2. Integrating Security Tools: The script was integrated seamlessly with cPHulk and CSF, using Python’s subprocess module. This integration, suggested by ChatGPT-4, was critical for the effective blocking of suspicious IPs.
  3. Handling Sensitive Data Securely: In dealing with login credentials, ChatGPT-4 recommended secure practices, such as using environment variables, which were crucial for maintaining the script’s integrity.
  4. Error Handling and Efficient Logging: Robust error handling and comprehensive logging, as advised by ChatGPT-4, ensured the system’s reliability and maintainability.
  5. Automating with Cron Jobs: The script’s automation was achieved through a cron job setup, a process in which ChatGPT-4 played an advisory role.
  6. WordPress Plugin for Tag Generation: Beyond the script, ChatGPT-4’s assistance extended to developing a WordPress plugin for generating tags for my blog posts. This plugin analyzes the content and contextually generates relevant tags, showcasing the AI’s versatility.

The Outcome: The result is a robust, AI-enhanced cybersecurity mechanism, complemented by an AI-driven tagging system for my blog. This project exemplifies the synergy between human expertise and AI in solving complex technical challenges.

Conclusion: This venture into AI-assisted development has not only fortified my server’s security but also revolutionised how I manage content on my blog. It stands as a testament to the power and potential of AI in cybersecurity and beyond.

Future Prospects: This successful collaboration with AI opens new horizons for future projects. I am excited to delve deeper into the integration of AI in various aspects of problem-solving, especially in technology and cybersecurity.

The Smart Ebike from Mercedes Benz – Update July 2020

Thanks for visiting this page, which is one of the most popular on my blog. If you would like to help support the us, please consider visiting my Amazon Store. Thanks again for visiting, Matt


Hyuhome Electric Bikes for Adult, Magnesium Alloy Ebikes Bicycles All Terrain,26" 36V 350W 13Ah Removable Lithium-Ion Battery Mountain Ebike for Mens
ADVERTISEMENT: Hyuhome Electric Bikes for Adult, Magnesium Alloy Ebikes Bicycles All Terrain,26″ 36V 350W 13Ah Removable Lithium-Ion Battery Mountain Ebike.

Smart eBike Support in the UK – 1 July 2020

I get quite a large number of messages in the UK requesting assistance with the Smart eBike. Whilst I am also an eBike owner, I also fall into the category of everyone else with regard to problem-solving and troubleshooting issues with our bikes. I have actually reached out to Mercedes Benz and highlighted the issue of ongoing support from them on these bikes, which of course cost all of us a fairly hefty sum of money at the time of purchase. 

Personally, I have struggled to get support with my bike and had to bend several peoples eardrums to get a result after feeling left high-and-dry in the event of needing assistance. I personally was successful getting the repair work done on my Smart eBike whilst also having a Firmware update to boot. The technician at Smart was very helpful and in fact, was excited to be involved in the maintenance of a vehicle that was no longer manufactured. This involved the installation of software on his PC and connection directly to the bike. It might well be a good time for Smart to release this software into the public domain to allow for their customers to continue to maintain their bikes for years to come.

This does continue to feel unfair as I have (like many others) approached bike repair shops for assistance and have got absolutely nowhere! So indeed the only port of call continues to be Mercedes Benz themselves.

So, the official line is that in event of any issues with your Smart eBike, you should contact Mercedes-Benz Customer Care on the following email address cs.uk@cac.mercedes-benz.com.  I am reliably informed that you will be assisted with your query.

You can also view the Smart eBike Owners manual online using this link. Now read on!!

Matt Porter – 1 July 2020


Last Saturday I visited Lancaster Mercedes in Ipswich, an hour later I left with a beautifully designed and engineered German machine. But this wasn’t an AMG SLK, this was the ‘smart e-bike’.
Continue reading The Smart Ebike from Mercedes Benz – Update July 2020