In today’s fast-paced motoring world, staying safe on the road is more important than ever. With accidents, fraudulent claims, and road rage incidents on the rise, a small but powerful gadget can make all the difference – the dashcam. Breakdown organisation GEM Motoring Assist has highlighted the increasing value of dashcams in ensuring safer roads and providing crucial evidence in case of incidents.
Why Invest in a Dashcam?
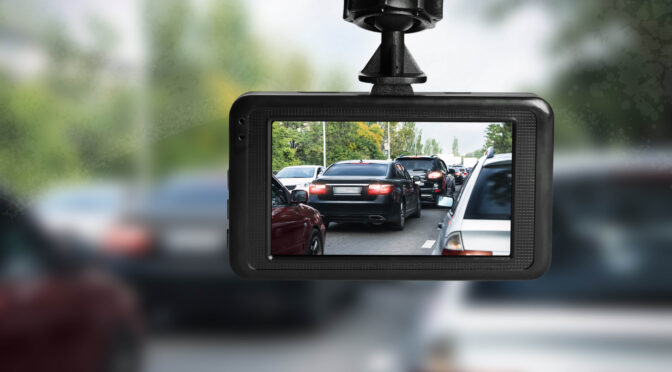
A dashcam is a small camera that mounts inside your vehicle to record the road ahead. Some models also include a rear-facing camera for full coverage. Dashcams have become significantly more affordable, with prices starting from as little as £20. This makes them an accessible tool for drivers looking to protect themselves from false claims, ‘crash-for-cash’ scams, and dangerous drivers.
James Luckhurst, GEM’s Head of Road Safety, emphasises the benefits: “If you’re a safe, conscientious driver, a dashcam helps protect your no-claims bonus, as well as allowing you to play your part in reporting offences, road rage incidents, and scams.”
Key Benefits of Using a Dashcam
- Evidence in Case of Accidents: A dashcam provides clear footage that can help prove fault in an accident, protecting you against fraudulent claims.
- Lower Insurance Premiums: Many insurers offer discounts to drivers who use dashcams, potentially reducing costs by up to 20%.
- Theft and Vandalism Deterrent: Parking mode enables dashcams to record even when the vehicle is stationary, discouraging theft and vandalism.
- Improved Driving Habits: New drivers can review footage to assess and enhance their driving skills.
- Capturing Unexpected Moments: From close calls to beautiful scenic drives, your dashcam can record experiences worth sharing.
What to Look for in a Dashcam
If you’re considering purchasing a dashcam, here are some essential features to consider:
- Video Quality: A minimum of 1080p resolution is recommended, with good low-light performance for night driving.
- Wide-Angle Lens: A wider field of view ensures more road coverage.
- GPS Functionality: Helps track speed and location, adding valuable data to recordings.
- Loop Recording: Ensures continuous recording by overwriting old footage when the memory fills up.
- Parking Mode: Offers surveillance when the car is parked, providing extra security.
The Legal Side of Dashcams
Dashcams are completely legal to use on UK roads, provided they do not obstruct the driver’s view. While they can be valuable in protecting you, it’s worth noting that dashcam footage can also be used against you in legal proceedings. If you’re at fault in an accident, your own dashcam could provide evidence to support a claim against you.
Additionally, if you submit footage of an offence to the police, you must be prepared to provide a statement and attend court if necessary. However, GEM notes that fewer than 2% of cases progress to a full trial.
How Dashcams Affect Insurance
A growing number of UK insurance providers recognise the benefits of dashcams and offer discounts to drivers who use them. Discounts typically range from 5% to 20%, depending on the insurer. The rationale is simple: dashcam users tend to be safer drivers, reducing the likelihood of accidents and fraudulent claims.
Final Thoughts
With the price of dashcams dropping and their benefits increasing, now is an excellent time to invest in one. As James Luckhurst concludes: “Fitting a dashcam is a sound move for road safety. Once installed, it’s good to know it can protect you in incidents where it might otherwise be your word against someone else’s.”
That said, a dashcam should complement—not replace—safe and courteous driving. By maintaining care, courtesy, and concentration on the road, we can all contribute to making UK roads safer for everyone.
For a more in-depth guide to fitting and using a dashcam, check out the Spring 2025 edition of GEM’s Good Motoring magazine.